The What
Store Interconnected Data
Scriptable Objects are great for storing data not directly connected to a game object, but too often we find ourselves trying to manage massive libraries of interconnected scriptable objects. As data sets grow they become cumbersome & error-prone to work with. The node editor was built as an artist & designer friendly solution to this problem.
The node editor is built on what I call blueprints. A blueprint contains all of your nodes & connections for a given system. These nodes are just like any other scripable object class, & can house whatever data & methods you like. You can have as many node types as you like within a given system, allowing you to build just about any functionality you like.
By combinging a massive data set into a single asset we make working with data significantly easier. Now this doesn’t nesicarily suit all use-cases, but it can be beneficial for a fairly wide range of applications.
Artist Friendly UX
At the core of this system is the node editor. The node editor allows us to create, rename, select, connect & delete the nodes of a given blueprint as desired. It has full undo/redo support, grid-snapping & box-select, all of the convenience items expected of a modern node editor. The editor can be further customized with tags or groups depending on the needs of your system.
Once nodes are selected within the editor they can be modified using the inspector, just like you would any other component or scriptable object.
To bring up a blueprint’s editor simply double click the blueprint in the project view.
The How
Blueprints
Blueprints are the base scriptable object. They house all child nodes / connections & are what is referenced by monobehaviours to make use of a systems data.
Each system will require its own flavor of blueprint that accepts its various compatible nodes. These are defined by inheriting from the base blueprint class.
Double-clicking a blueprint will bring up the grid interface, allowing you to add, remove & connect nodes as you please.
Nodes
Nodes are nested datasets that store the actual data of a given system. A single blueprint can accept multiple node types, built for whatever you wish.
Nodes are defined by inheriting from the base GridNode class. You can them give whatever data & methods you require.
Under the hood nodes are seperate child scriptable objects, stored within the parent asset. To select them you simply left click or box select them in the interface. You can them modify them in the inspector like you would any other asset.
Connections
Connections link nodes in parent/child or directional relationships & are how you connect your data. A single node can only have a single parent, but may contain as many children as you wish.
These can be set up by simply right clicking a child node in the interface, selecting parent to, & clicking a parent.
When working with nodes you can easily query if a node is a root, get it’s parent or any of it’s children, similar to working with a game objects transform.
Example Use Cases
Ragdolls
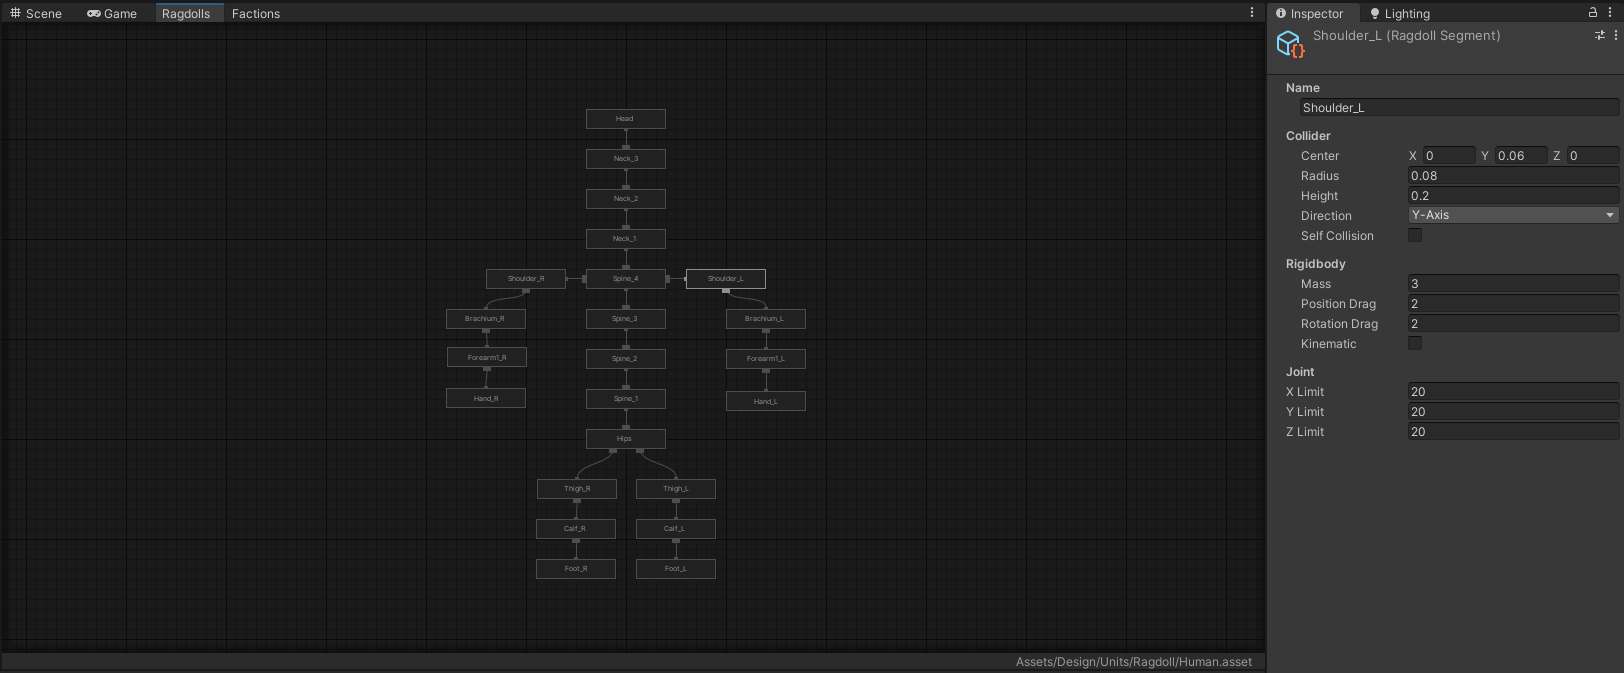
Ragdolls are a perfect use case for this style of editor. We store all of the relative collision & joint information on the bones of a full ragdoll in nodes. Then at runtime when we want to trigger the ragdoll, we simply iterate over the nodes, find the relevant bones & instantiate the required colliders & joints.
Alternatively, we could set up a separate prefab variant for our character, & spawn/position them when triggering the ragdoll. By storing this information separately, as opposed to in a prefab variant we can share the ragdoll data across multiple characters/rigs without having to maintain multiple ragdoll prefab variants.
You can see this implementation in action in the combat prototype.
Quest & Dialog Trees
A hierarchy-based node tool is perfect for quest & dialog trees. You can easily introduce different node types for basic dialog, branching dialog choices, reputation, event, or other logic checks, & visualize how all of these options fork & recombine to create a quest tree or conversation.
Admittidely, if you’re building a narrative driven game that focuses a lot on dialog, there are probably better tools out there that writers would prefer to use, but if your a small studio without dedicated writers, that wants a quick tool for your designers to pick up & use, this is definitely a solid option.
Factions & Alliances
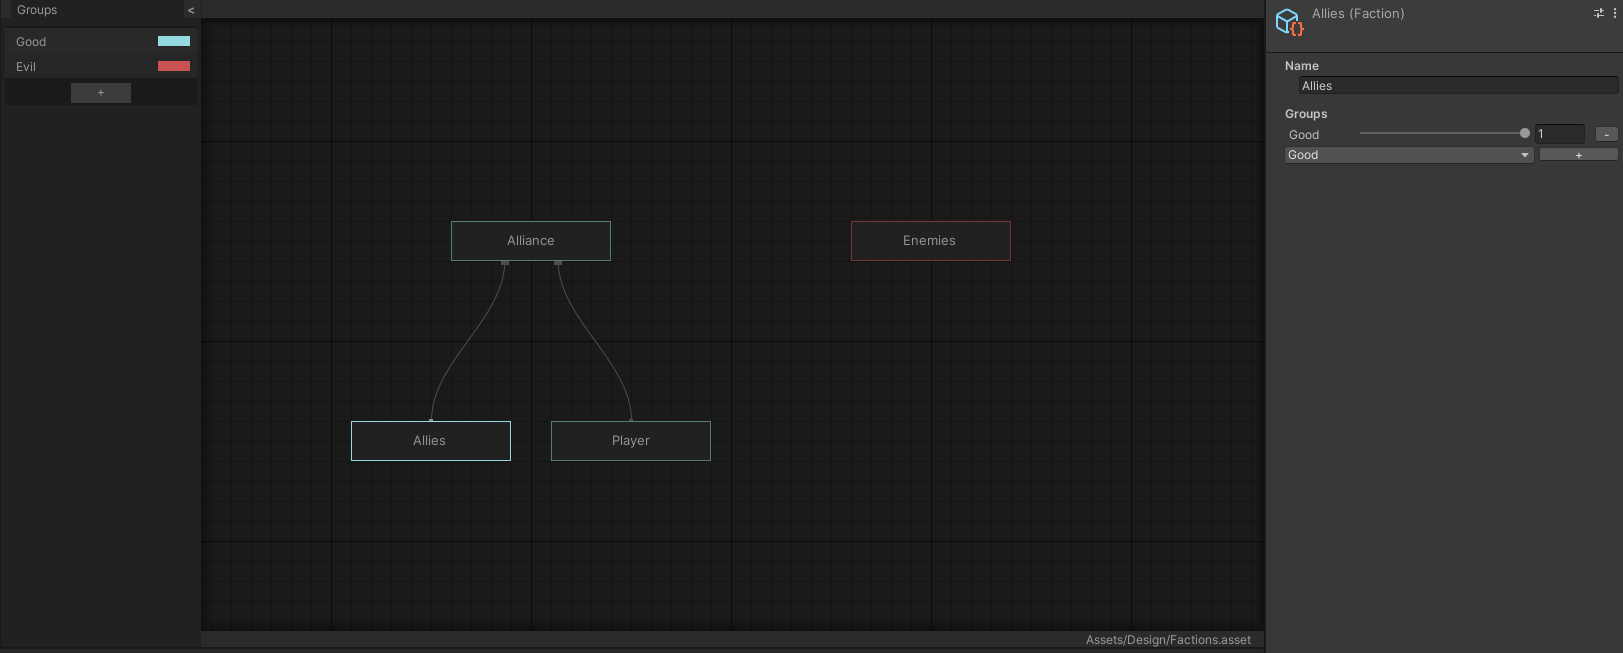
Factions, alliances & diplomacy are another great use-cases for this style of editor, so long as they are planned to be fixed. If your game world has a complex net of factions, alliances & relationships a visual editor can help designers easily organize, group & visualize how these various parties interact.
I’ve already built this style of system for AI targeting, though I only took the implementation as far as I needed at the time, which was pretty bare bones. You can see this implementation in action in the combat prototype.
Inventory or Commodity Systems
Having all of your item or commodity archetypes as separate scriptable objects can be incredibly cumbersome to maintain, group & organize. having all of that data in one centralized, easy-to-access interface makes it incredibly easy for your designers to manage your content library. It also means you can reference a single scriptable object for your game’s entire inventory or commodity library, making working with data a breeze.
You could also use external databases & tools to manage this data, but then your designers need to learn additional tools outside of Unity & iterating becomes slow & painful. Having a simple, easy-to-use interface that helps organize & manage our data solves all of our problems nicely.

